LavaVisor Service Manager
📄 Overview
Lavavisor Service Manager is a feature to enable the users to run one lavavisor service to manage multiple lavap services.
The benefit of using this approach is that running only one lavavisor instance can save on some rpc calls as opposed to the lavavisor wrap command
that each lavavisor instance would query once every 30 seconds.
We improved the rpc calls intervals in recent patches so we recommend using the lavavisor wrap or pod commands instead of the service manager command. This is still applicable even for multiple services.
♨️ Commands
> lavavisor init
LavaVisor init command initializes the environment for LavaVisor. It is generally the first command run when using LavaVisor.
Optional Flags:
--directory - specifies the protocol flags directory (default "~/")
--auto-download - automatically downloads missing binaries
--auto-start - automatically issues start after the init command completes
Example usage:
Ensure that you replace {CHAIN_ID} with the appropriate value for your target network:
- Lava Mainnet:
lava-mainnet-1 - Lava Testnet:
lava-testnet-2
Additionally, replace {PUBLIC_RPC} with the correct endpoint.
lavavisor init --auto-download --chain-id {CHAIN_ID}
> lavavisor create-service
LavaVisor uses service files for each provider/consumer at play. LavaVisor create-service command creates these files according to the supplied consumer/provider config file and flags.
You must specify whether you are creating a provider or consumer and the location of the config file.
Example usage:
# Provider Example
lavavisor create-service provider ./config --geolocation 1 --from user --log_level warn

# Consumer Example
lavavisor create-service consumer ./config --geolocation 1 --from user2 --log_level info
> lavavisor start
LavaVisor starts the specified services using the linked binary. It also starts the LavaVisor version monitor. The simplest way to activate this is by running the command lavavisor init --auto-download --auto-start. Secondarily, you can use the start command on your own, to further configure your provider/consumer or create services.
🗜️ Test
-
First of all, LavaVisor should run in a node which is connected to a running Lava Network (local or public).
-
Run
lavavisor init --auto-download→ This will setup LavaVisor directory and link the protocol binary
-
Instead of creating service files manually, execute
lavavisor create-servicecommand to generate the service files. Let’s say we want to start one consumer and two provider processes, then we need to execute total of three commands like this:-
lavavisor create-service consumer /home/ubuntu/config/consumer-ETH1.yml --geolocation 1 --from user1 --log_level info --keyring-backend test --chain-id {CHAIN_ID} --node {PUBLIC_RPC} -
lavavisor create-service provider /home/ubuntu/config/provider1-ETH1.yml --geolocation 1 --from servicer1 --log_level info --keyring-backend test --chain-id {CHAIN_ID} --node {PUBLIC_RPC} -
lavavisor create-service provider /home/ubuntu/config/provider1-LAV1.yml --geolocation 1 --from servicer2 --log_level info --keyring-backend test --chain-id {CHAIN_ID} --node {PUBLIC_RPC}
-
-
Check the
~/.lavavisor/dir and validateconfig.yml. It should look like this (adjust the service names according to your process):
services:
  - consumer-ETH1
  - provider1-ETH1
  - provider1-LAV1
- The
create-servicecommand should also create aservice_configsfolder within the.lavavisor/servicesdirectory and copy the configuration files provided as command arguments (e.g., provider1-ETH1.yml). Ensure the directory and configuration files exist.
- ✅ Example provider config file:
- ✅ Example consumer config file:
endpoints:
  - api-interface: jsonrpc
    chain-id: ETH1
    network-address:
      address: 127.0.0.1:2221
    node-urls:
      - url: wss://eth-exampleprovider.net/eth/ws/
endpoints:
    - chain-id: ETH1
      api-interface: jsonrpc
      network-address: 127.0.0.1:3333
metrics-listen-address: ":7779"
-
Execute
lavavisor start, and you should observe all services running. Additionally, the version monitor will begin validating versions.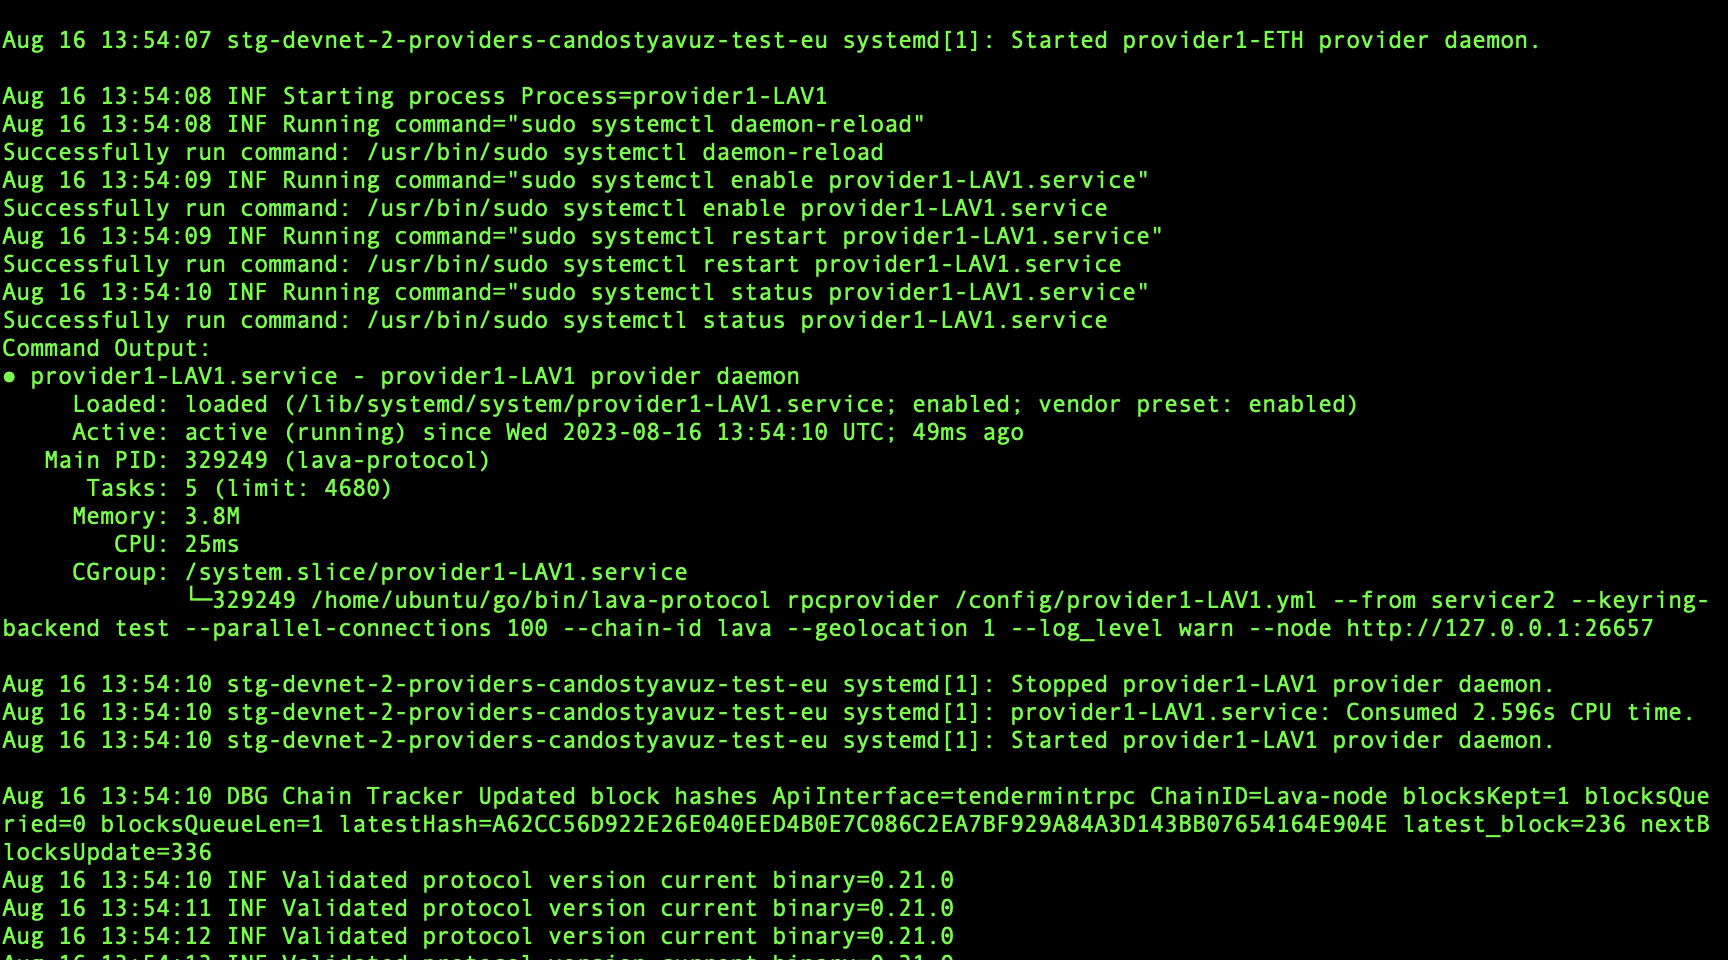
-
Now we need to make an upgrade proposal by using
/govmodule, so that protocol version will change in the consensus and LavaVisor will detect & initiate auto-upgrade.🔽 Here is an example
proposal.jsonfile:📄 proposal.json
🔽 Here is the script for sending version update proposal transaction (for Cosmos SDK v0.47.0):
📄 upgrade_chain.sh
(Fix proposal ID 4 according to your state - if you didn’t run ‘init_chain_commands’ you should put 1 there)
-
After the proposal passed, LavaVisor will detect the event and update the binaries. Then, it will reboot the processes with the new established symbolic link:
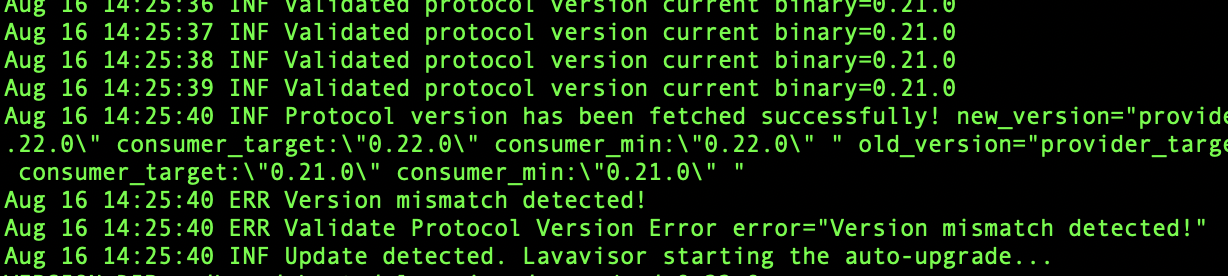
❗ Update detected
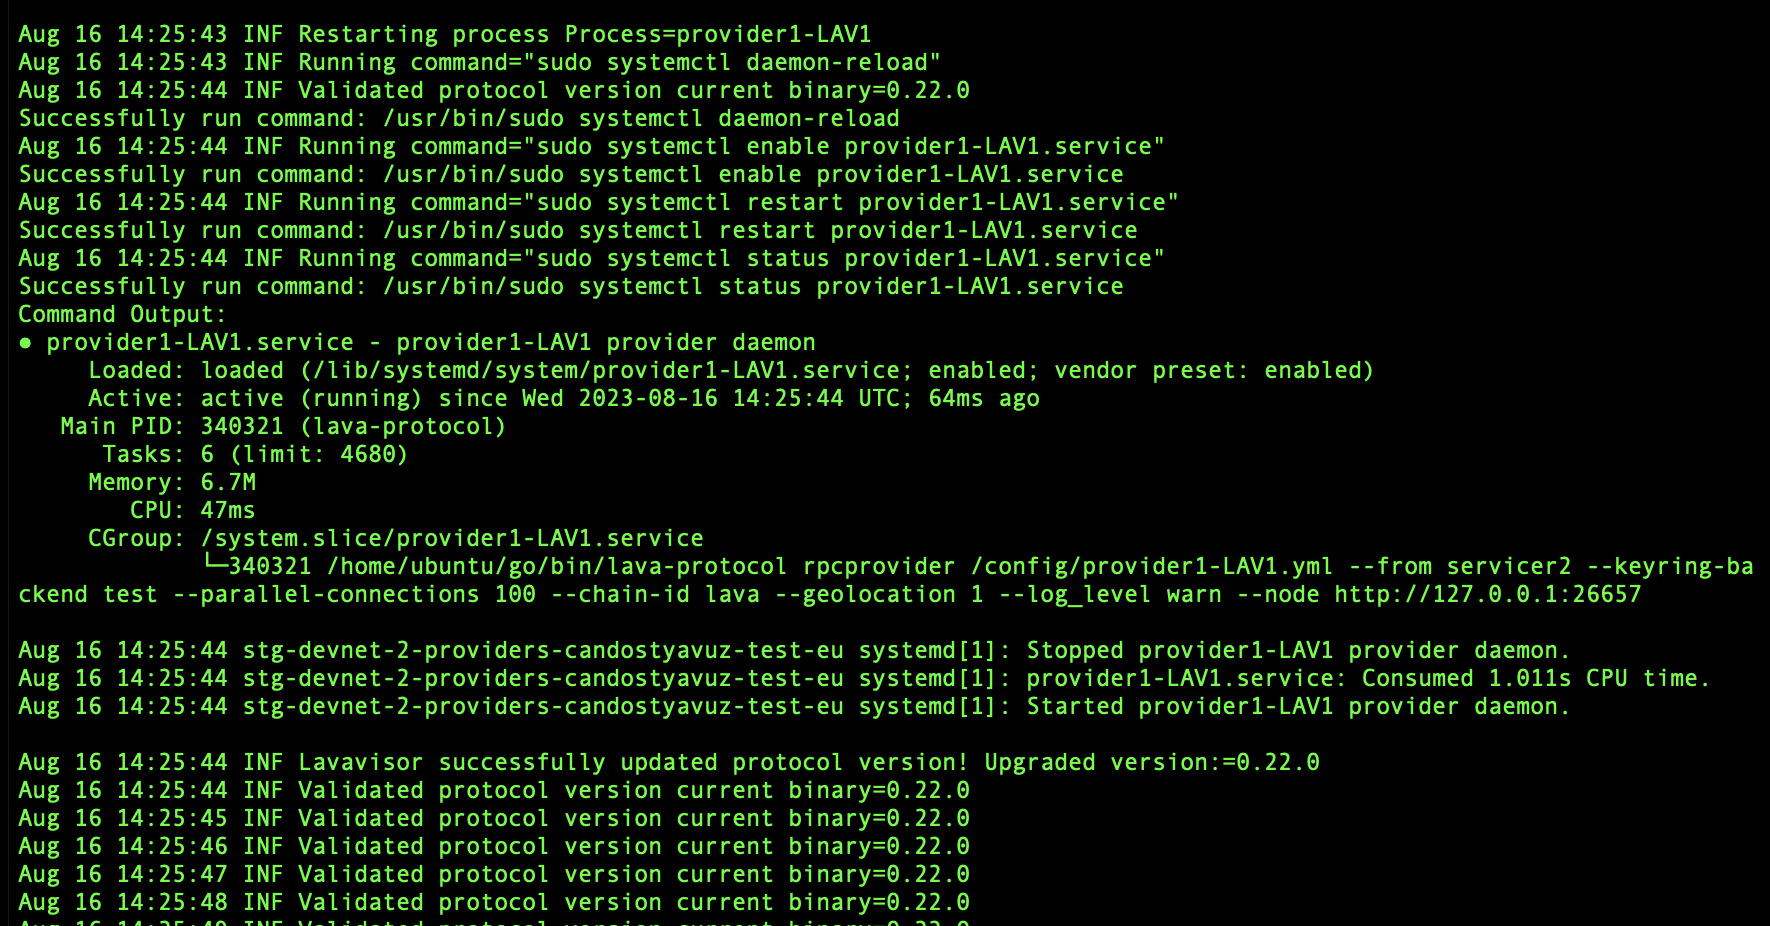
✔️ Upgrade successful